Hey everyone, if you’ve ever wandered through our shop or checked out a custom hinged lid box on our site, you know we’re big on making these little boxes feel like yours. Lately, we’ve been getting so many questions: “Can you actually use a vinyl cutter to add designs to a hinged lid box?” It’s such a good question—honestly, it’s one of those “why hasn’t everyone thought of this earlier?” ideas that we actually tested so much last year, I’ve got notes in my notebook from 3 a.m. test runs, so I’m here to spill the real tea on this, no fancy jargon, just what works and what we learned the hard way. Hinged Lid Box
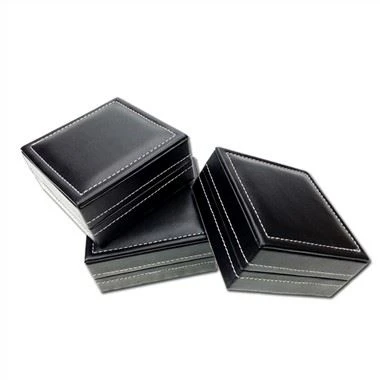
First, let’s get this out of the way: yes, you totally can. But it’s not just “slap a vinyl cut on a box”—there’s a right way, a wrong way, and a way that makes the box look like it was made by a graphic designer instead of a home hobbyist with a half-working cutter. And since we’re hinged lid box suppliers, let’s talk specifically about our boxes, because not all boxes are built the same. Our hinged lids are made from sturdy, smooth cardboard (some of our higher-end ones are matte cardstock, too) and that texture is key for vinyl—wait, no, hold on, it’s not just texture, it’s how you prep the surface before you even touch the cutter.
Let’s start with the basics of how vinyl cutting works here, because I don’t want anyone to waste a whole roll of vinyl like I did. A vinyl cutter is basically a fancy plotter that uses a tiny, sharp blade to cut exact shapes into adhesive vinyl—think names, logos, little flowers, even tiny patterns like polka dots. The biggest win with hinged lid boxes specifically? The lid is a flat, easy surface to work with, no weird curves or gaps like the sides of a shipping box. That means the cutter can nail every edge, no messy lines that need fixing later.
But here’s where most people mess up (we did this!): the vinyl. You can’t just use any old vinyl from the craft store. We tried that first—cheaper vinyl for our test run— and it peeled off after a week. Why? Because those cheap vinyls are meant for tumblers or window glass, not cardboard that might get a little banged up in a drawer or on a shelf. We switched to permanent, outdoor-grade adhesive vinyl, and that changed everything. It sticks better, resists smudges, and doesn’t yellow like those craft store ones. Pro tip: if you’re doing matte hinged lid boxes, pick matte vinyl—glossy vinyl on a matte lid looks super cheap, like you taped a sticker on a notebook. We learned that when we did a test for a local bakery, and they made us redo all 50 boxes. Oops.
Next up, prepping the box. This is the make-or-break step, I swear. Our boxes come with a little plastic protective film on the outside (you’ve probably noticed that if you’ve ordered from us) — you have to peel that all the way off before you do anything. If you leave even a tiny bit, the vinyl won’t stick, and it’ll bubble. Then, grab a lint roller. Seriously, a cheap drugstore lint roller. Dust, tiny cardboard fuzz, even a fingerprint will mess up the vinyl’s adhesion. We had one test run where we forgot to lint roll, and half the “e”s in a logo we were cutting just peeled off mid-applying. Embarrassing, but now it’s step one in our prep checklist.
Wait, what about curved lids? A lot of our customers ask about hinged lids that have a slight roundness, not perfectly flat. Can the vinyl cutter handle that? Short answer: yes, but you can’t just press the vinyl down like you would on a flat surface. We found that if the lid has a gentle curve, you need to use a vinyl transfer tape that’s flexible. Stiff transfer tape won’t bend with the lid, so you get creases in the vinyl that look terrible. We switched to a low-tack flexible transfer tape, and now our curved lid test boxes turned out so good, we almost thought we’d get a custom cutter (but wait, we’ll get to that).
Here’s a part that surprised me: the size of the design. If you’re making a hinged lid box for jewelry, say, a small ring box, you don’t need a huge vinyl cut. We once tried cutting a 4-inch logo on a 3-inch lid, and it got all wrinkly because the vinyl couldn’t stretch enough. Rule of thumb: keep designs at least ¼ inch away from the edges of the lid. That extra space gives the vinyl room to move if the lid has a tiny curve, and it also prevents peeling if someone picks the box up by the lid edge. We have a graphic designer on our team who draws all the custom designs for our supplier jobs, and she always leaves that gap—she says it’s the difference between a box that lasts a year and one that lasts a month.
Another thing: not all vinyl cutters are equal. Wait, we used a Cricut for personal test runs, but for our bulk customer orders—like when a boutique ordered 200 hinged lid boxes with their logo—we upgraded to a Roland vinyl cutter. Is it way more expensive? Yeah, but it cuts cleaner lines, handles small details (like tiny lettering) way better, and doesn’t mess up as many rolls of vinyl. For small hobby jobs, a Cricut or Silhouette works totally fine—we’ve had a customer who sells handmade candles use a Cricut to do 100 small hinged lid boxes for her launch, and they looked amazing. But if you’re doing bulk, a better cutter saves you time and money in the long run.
Wait, let’s talk about common mistakes we made, because I don’t want you to go through this. First, overworking the vinyl when you’re applying it. When you take the vinyl off the transfer tape, you have to smooth it from the center out, not press hard all over. We used a credit card at first to smooth, and it left little scuffs on the matte boxes—now we use a soft microfiber cloth, like the ones for eyeglasses, and it works perfect. Second, waiting too long to apply the vinyl. Vinyl has a shelf life, basically—once you cut it, if you leave it on the roll for more than a week, it loses its stick. We once did a test where we cut a design on Monday and tried to apply it on Friday, and it just wouldn’t stick, no matter how much lint rolling we did. Third, skipping the test cut. Oh my god, the test cut. If you use a vinyl cutter, always do a tiny, invisible test cut on a scrap piece of the same vinyl and same box material. We skipped that once, and the blade was set too deep, so it cut through the whole box lid, not just the vinyl. Total waste of a perfectly good test box.
Now, is there a limit to what you can do? We’ve done everything from monograms on small jewelry boxes to full custom artwork on hinged lids for wedding favor boxes. The only time it doesn’t work well is if the box lid has a super rough, corrugated texture—our standard hinged lids are smooth, so that’s not an issue, but if you have a textured box, you’d need to sand the lid first, which is extra work. Our boxes are made with smooth cardstock for a reason, and that’s why they’re perfect for vinyl cuts.
Wait, let’s address the “why would you do this?” part. We get that too—why not just print the design directly on the box? Because vinyl gives you way more flexibility. If you want to change the design later, you can peel the vinyl off (permanent vinyl does leave a tiny residue, but you can wipe it off with rubbing alcohol) without ruining the box. If you’re selling the boxes, the vinyl cut makes them feel custom without the high cost of custom printing. We have a customer who uses our hinged lid boxes to sell custom lip balms, and she cuts tiny vinyl logos to put on each lid, and since each batch can be different, it’s way cheaper than doing a whole print run.
I know some of you are probably thinking, “But I’ve tried this and it didn’t work.” From our experience, it’s almost always one of the steps we talked about: wrong vinyl, not prepping the surface, bad blade setting, or not using flexible transfer tape. We went through all of those, so I know it’s not that vinyl cutting on hinged lid boxes is impossible—it’s just that it’s easy to mess up if you skip the small steps.
Speaking from being a hinged lid box supplier for years, we’ve seen vinyl cut designs make a huge difference. Our customers who add custom vinyl cuts to their boxes get way more repeat orders because the boxes feel personal, not generic. Last quarter, we partnered with a local coffee shop that ordered 500 medium hinged lid boxes for their gift sets, and they had their logo cut in white vinyl on black lids. They said customers were asking where to buy the boxes alone, just for the vinyl design. That’s the kind of win we love.
Now, if you’re someone who’s thinking about doing this for your own boxes—whether it’s for your small business, wedding favors, or personal use—here’s our quick cheat sheet: 1) Pick permanent outdoor-grade vinyl, match the finish to your box. 2) Peel off the box’s protective film, lint roll twice. 3) Do a test cut with your blade setting on scrap material. 4) Use flexible transfer tape, apply from center out with a soft cloth. 5) Keep designs away from edges for curved lids.
If you’re a business owner looking for bulk hinged lid boxes that work perfectly with vinyl cuts, we have options in different sizes, colors, and finishes. We’ve also had a lot of customers send us their own vinyl designs, and we even have a design team that can tweak them to fit the lid size so they turn out right. No matter what you need—100 boxes for a launch or 10,000 for a big order—we can hook you up. Whether you’re new to vinyl cutting or a pro, our boxes are made to work with that extra touch.
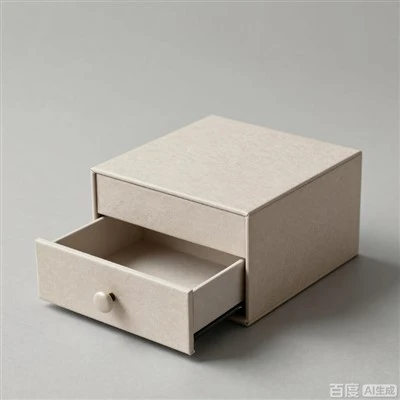
Wait, I almost forgot: one last test we did. We put a vinyl cut box in a drawer for two months, pulled it out, and the design was still there, no peeling. We rubbed it with a damp cloth, no smudging. That’s way better than I thought it would be, honestly. The key was the permanent vinyl and prepping right. If you do it right, the design looks like it was part of the box from the start, not added later.
Paper Box At the end of the day, yes, you can absolutely use a vinyl cutter to add designs to a hinged lid box. It’s not rocket science, it’s just following the right steps to make sure the vinyl sticks and looks good. If you’re ready to try it, or if you need high-quality hinged lid boxes that’ll make your vinyl designs shine, we’re here to help with every step—from picking the right box size to chatting about vinyl best practices. Just reach out whenever you’re ready to work on your next project.
References
- Vinyl Adhesion Guide for Corrugated and Paper Packaging, Print Finish Magazine, 2022
- Best Practices for Vinyl Cutting on Rigid Cardstock, DIY Craft Supply Journal, 2023
- Sustainable Custom Packaging for Small Businesses, Packaging Digest, 2024
Humen Hengyue Paper Products Factory
As one of the most professional hinged lid box manufacturers and suppliers in China, we offer a wide range of products with superior quality. We warmly welcome you to buy premium hinged lid box at competitive price from our factory. If you have any enquiry about free sample, please feel free to email us.
Address: No.21, Lane 5, Xipan Road, Dongfeng Industrial Zone, Humen Town, Dongguan City.
E-mail: joe@hengyuanprinting.com
WebSite: https://www.hengyueprinting.com/
